EPM 11.1.2.4 and SQL Server on Ubuntu


Today we try something different. I have a stock Ubuntu installation in Hyper-V. Microsoft has released SQL Server for Linux, I think SQL Server for Linux is a Release Candidate (RC), which we over at Tevpro have been using with some .NET Core applications. Lastly, I need a VM of 11.1.2.4 for testing some code I am working on. So... I am going to try and run EPM 11.1.2.4 on the Linux version of MS SQL Server.
What am I going to install:
- Foundation Services
- Calculation Manager
- Planning
- Essbase
Why am I not installing FDMEE, HFM, etc? I don't need them at the moment but that could change so this may turn into a multi-part post.
Why do I have the desire to try this now? Well I recently rolled off the project I have been on for close to two years and had some free time while looking for a new project (hire me).
Installing SQL Server
If you didn't know Microsoft has become really cool in the last couple years and is embracing Open Source and Linux. Having been a .NET/ASP.NET/Classic ASP/Cold Fusion developer prior to coming into the EPM community I have long loved SQL Server. A big reason for that is SQL Server Management Studio (SSMS), which in my opinion the standard by which all other SQL Tools are judged. Anyway, Microsoft has some really good documentation on getting SQL Server installed on Linux, so the process is a snap. About the only requirement for installation is that the system has at least 3.25 GB of Memory, which since this going to be an EPM server is pretty much guaranteed.
-
Import the Microsofts public GPG keys:
crl https://packages.microsoft.com/keys/microsoft.asc | sudo apt-key add - -
Register add Microsoft SQL Server repository to APT:
curl https://packages.microsoft.com/config/ubuntu/16.04/mssql-server.list | sudo tee /etc/apt/sources.list.d/mssql-server.list -
Update APT:
sudo apt-get update -
Install SQL Server using APT
sudo apt-get install -y mssql-server -
Run the configuration utility and setup the sa (System Administrator) password.
sudo /opt/mssql/bin/mssql-conf setup -
Verify that SQL Server is running
systemctl status mssql-serveror
sudo service mssql-server status -
Open the SQL Server port (1433) on your firewall[1]
To anyone who has installed Oracle on Linux, you will be amazed at how fast and easy this is by comparison.
Setup Databases
I already have SSMS but if you do not I would suggest you download SSMS[2]. Open up SSMS and connect to the SQL Server.
-
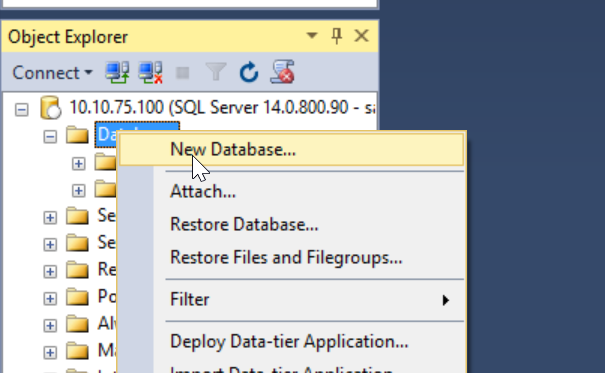
Select New Database under databases to open up the new database dialog.
-
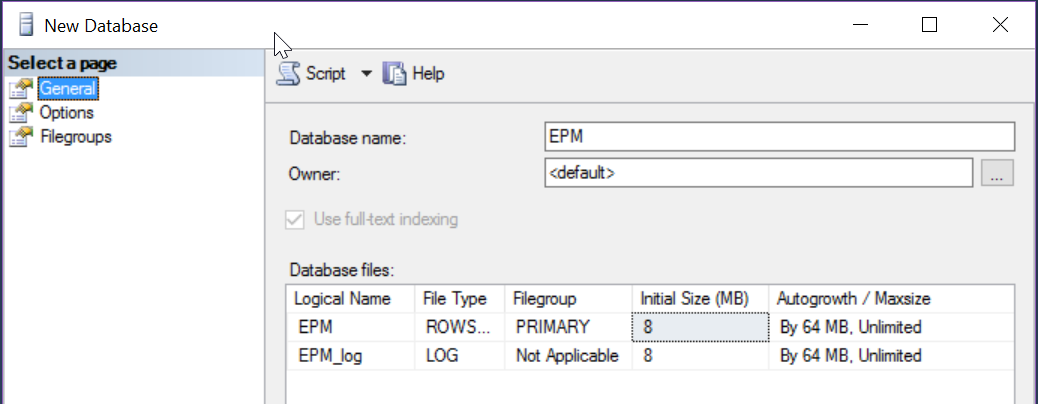
Define the name of the database as well as any specific settings you might want.
-
Repeat steps one and two until all necessary databases are created.[3]
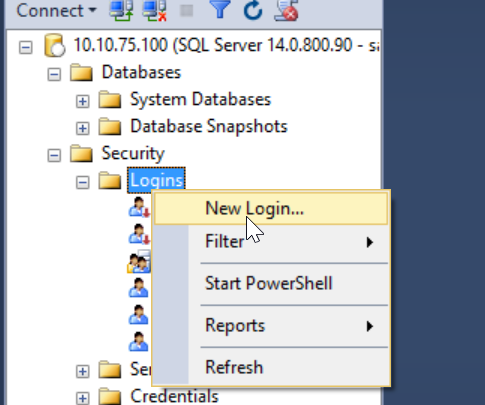
- Create a user(s) that will be used to connect to your databases.
- Find Security then locate Logins, right click and New Login
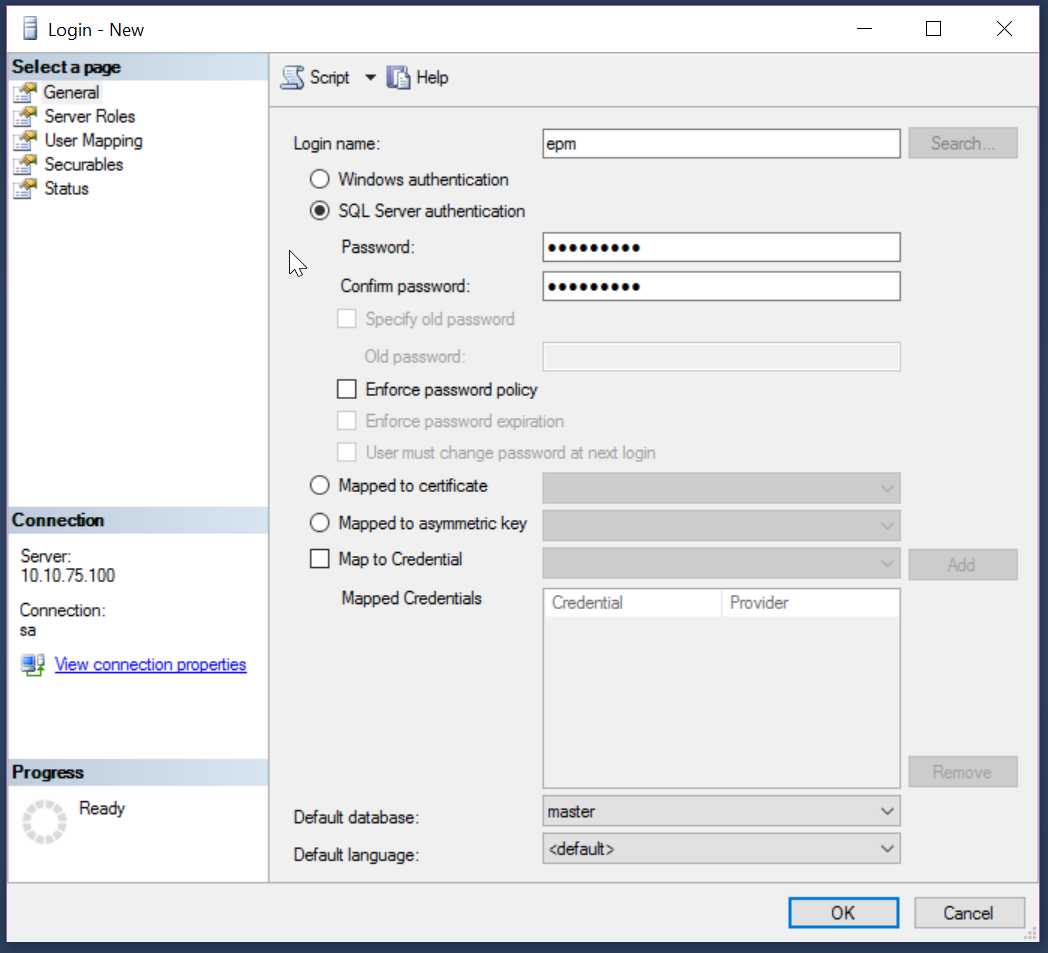
- Specify the Login name and Password
- Select User Mapping
- Select the desired database you want to assign this user access to.
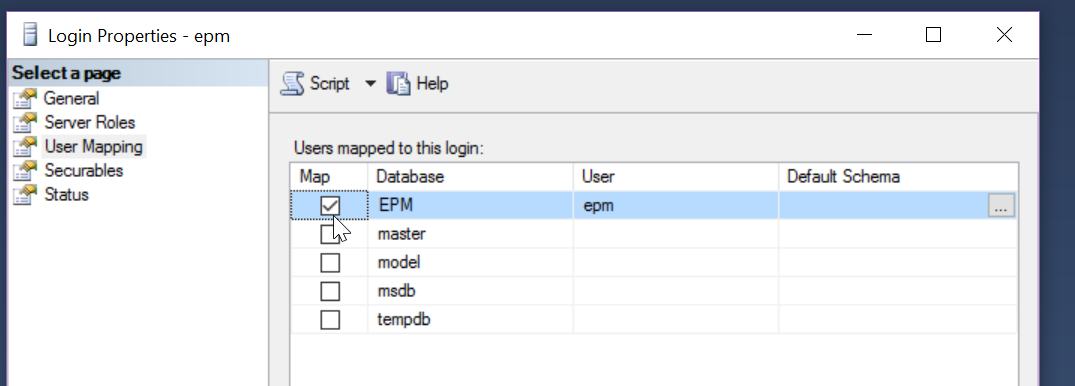
- Assign the user to the desired roles for the database.
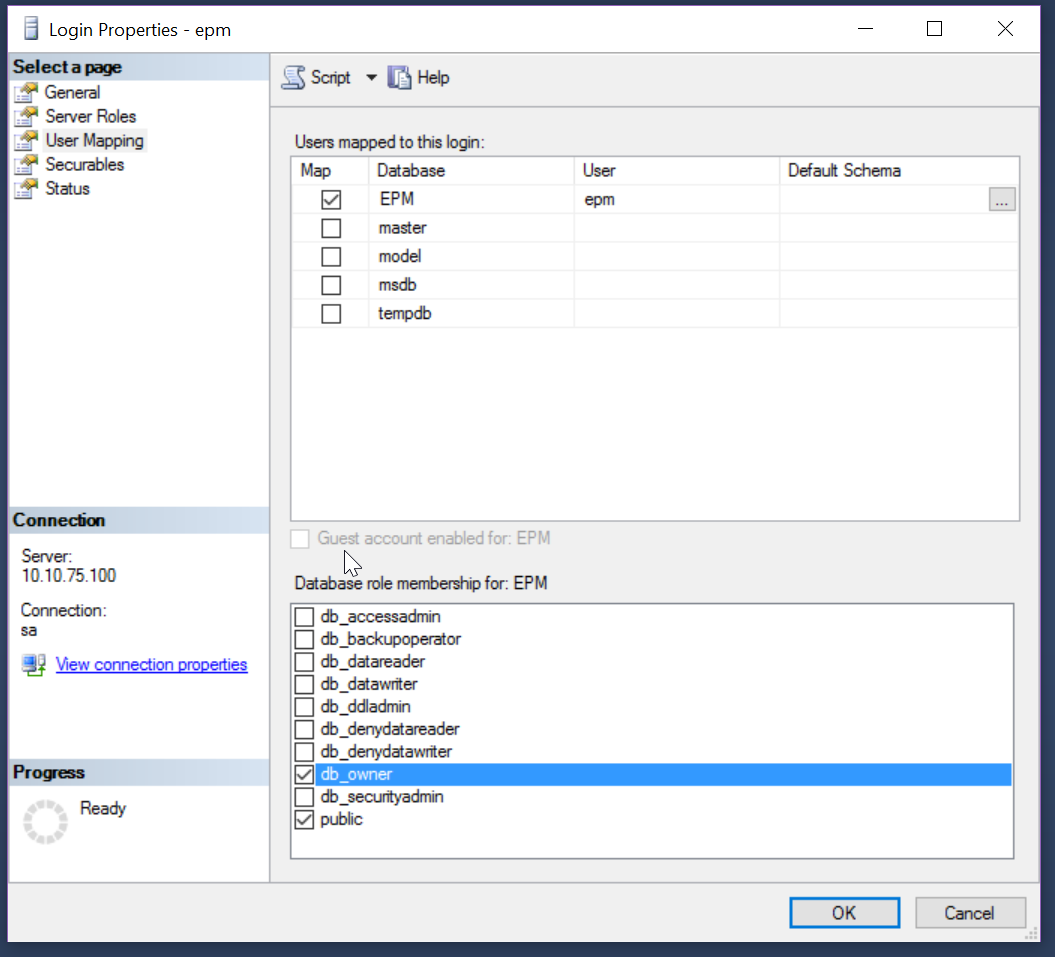
- Repeat steps four and five for each database this user should have access to.
- Find Security then locate Logins, right click and New Login
Downloading EPM 11.1.2.4
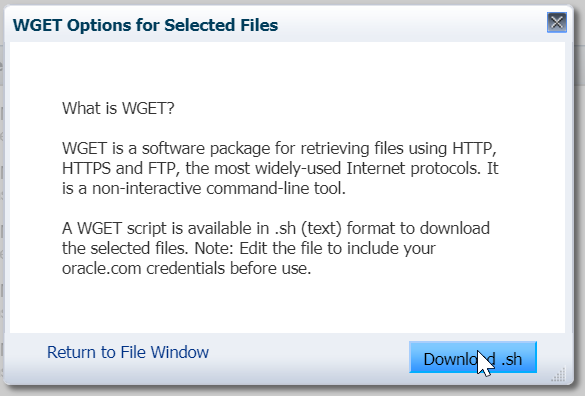
Oh, E-Delivery you are a pain. A necessary pain that I do not enjoy. E-Delivery has the option to download a wget.sh file that can be used download the installation files.
-
Login to E-Delivery
-
Locate the desired software package and set Linux x86 64

-
Uncheck the software you don't need (never understood why DRM, Client tools, and other non-Linux items were selected by default.)
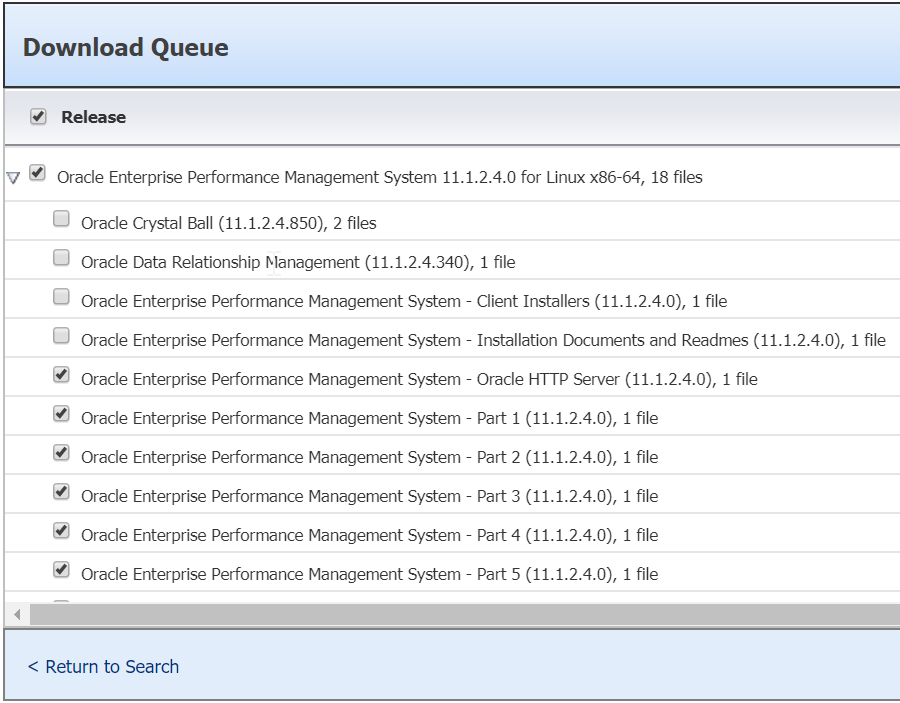
-
Select WGET Options
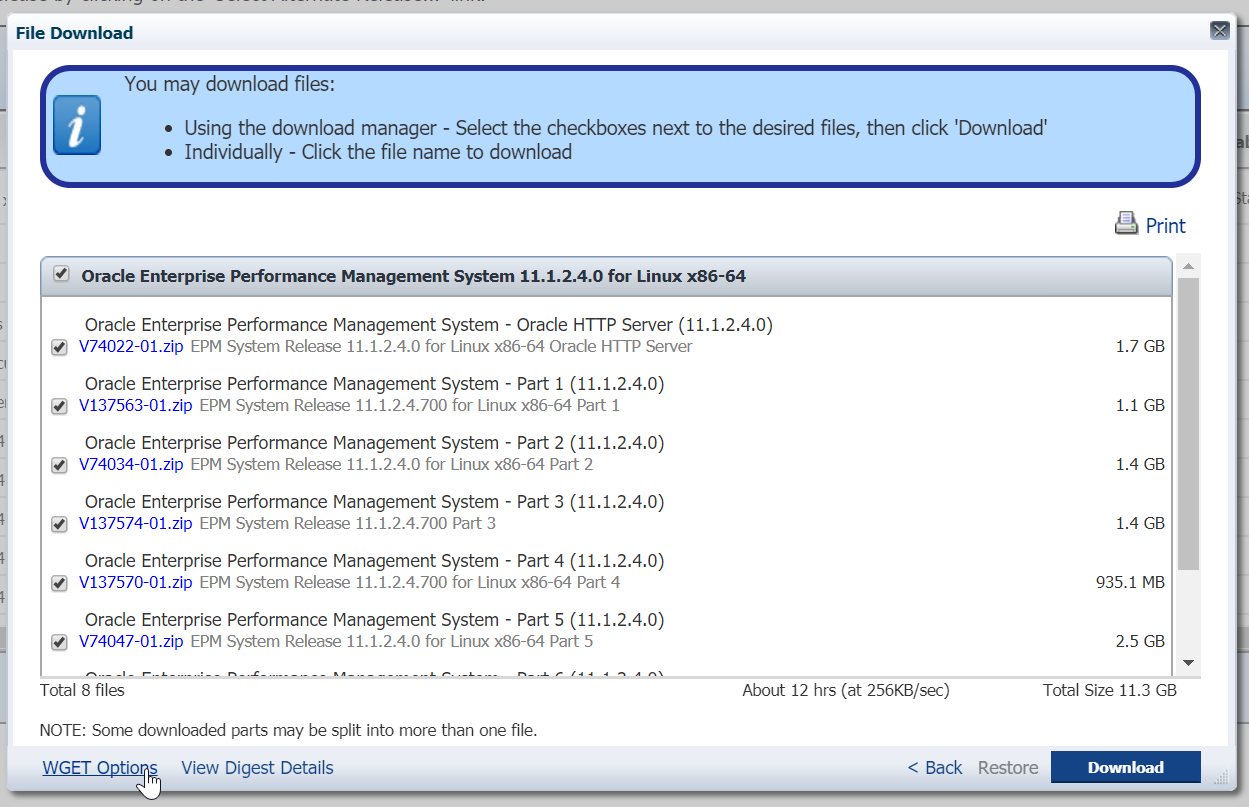
-
Download the wget.sh script
-
Copy the file to the Linux server.
-
Edit the first line of the wget.sh script since its targeting the sh shell which does not support the
-soption on thereadcommand.#!/bin/shChange this line to use bash shell.
#!/bin/bash -
Run the wget.sh command and follow the prompts.
./wget.sh
-
Go get coffee. Even though I have a 200Mbs connection its going to take a while.
Prepare for installation
-
Unzip the files into a single directory
unzip 'V*.zip' -d InstallFiles -
Create the user who will do the installation and run the applications once installed.
sudo adduser epm -
Modify /etc/security/limits.conf to increase the hard and soft file descriptor limits.
epm hard nofile 131072 epm soft nofile 4096 -
Install make, gcc, rpm, libxtst6, libxi6 and libaio (see footnote 15)
sudo apt-get install build-essential rpm libxtst6 libaio1 libpth-dev libpthread-stubs0-dev -
Link rpm to the location the EPM installer is expecting it at and x86-64-linux-gnu to /usr/lib64.
ln -s /usr/bin/rpm /bin/rpm ln -s /usr/lib/x86_64-linux-gnu /usr/lib64 -
Set the X11 display setting (even though I am using console, something in OHS requires it)
export DISPLAY=:0.0 -
Move the install files to a directory owned by that user
sudo mv InstallFiles /home/epm/ -
Change the owner of the files
sudo chown -R epm:epm /home/epm/InstallFiles -
Become the new user
sudo su - epm -
Change directory to the install folder.
cd ~/InstallFiles
Install Oracle EPM
So for this particular installation, I forgot to add the GUI and don't really want to install Xming. So console it is.
-
Run the install tool.
./installTool.sh -console -
Since I want English I select 0
-
Verify prerequisite checks are successful[4]
-
Define the EPM installation path (/home/epm/Oracle/Middleware)
-
Select a New Installation (Option 0)
-
Select components to install (this is where it gets tricky in the console.)
- At Oracle EPM System - 2: Expand
- Foundation Services - 2: Expand
- Foundation Components - 0: Select
- Foundation Services Java Web Application
- Static Content Files
- Oracle HTTP Server
- WebLogic Application Server
- Oracle Database Client 32-bit - 0: Next[5]
- Reporting and Analysis - 0: Select[8]
-
Confirm my selections
Checking for available disk space in the /home/epm/Oracle/Middleware/EPMSystem11R1 directory.
The selected components require 12703 MB free disk space.
You have 91985 MB free disk space.

EPM Oracle Home: /home/epm/Oracle/Middleware/EPMSystem11R1
     Common Components
     Essbase Product Common Components
     Product Common Components
     Oracle Common Files
     Tools
     OPMN
Foundation Services
     Calculation Manager Java Web Application
     WebLogic Application Server
     Oracle HTTP Server
     Static Content Files
     Workspace Java Web Application
     Foundation Services Java Web Applications
Essbase
     Essbase Client Samples
     Essbase Client
     Essbase Server Samples
     Essbase Server
Provider Services Java Web Application
Essbase Administration Services Java Web Application
Reporting and Analysis
     Financial Reporting Java Web Application
     Framework Services and Common Libraries
     Framework Java Web Application
Planning
     Planning Java Web Application
Financial Management
     Financial Management SDK
FDM Enterprise Edition
     FDM Enterprise Edition Java Web Application
     ODI
Configure Oracle EPM
Next, we move on to the configuration.
-
Change to configuration directory
cd ~/Oracle/Middleware/EPMSystem11R1/common/config/11.1.2.0 -
Run configuration utility
./configtool.sh -console -
Set the EPM Oracle Instance path
/home/epm/Oracle/Middleware/user_projects -
Set the Oracle EPM Instance Name
epmsystem1 -
Setup Shared Services and Registry Database Connection - 1: Perform the first-time configuration of a Shared Services database
- Set the Database Type - 0: Oracle's MS SQL Server Driver (Type 4)
- Server: localhost
- Port: 1433
- Database Name: EPM[11]
-
Select initial items selection - 2: Uncheck All
- Hyperion Foundation - 0: Select
- FDM Enterprise Edition - 1: Deselect
- Essbase - 0: Select
- Financial Management - 0: Select
- Planning - 0: Select
- Reporting and Analysis - 0: Select
-
Use SSL - 1: No
-
Mail Server Host: None
-
Outgoing Port: 25
-
Incoming Port: 143
-
Administrator's Email Address: None
-
Use SSL for mail - 1: No
-
Enable SSL offloading - 1: No
-
Use authentication to send email - 1: No
-
LCM Export Import Location:
/home/epm/Oracle/Middleware/user_projects/epmsystem1/import_export -
Configure Database - 0: Oracle's MS SQL Server Driver (Type 4)[12]
-
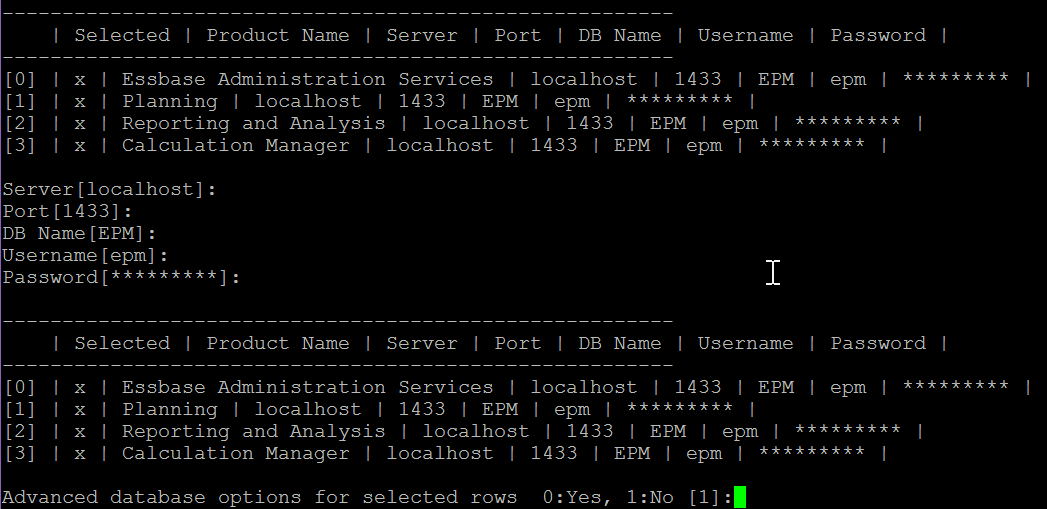
Enter the number of components you want to configure, divided by a comma: 0, 1, 2, 3. This will configure the following in my environment:
- Essbase Administration Services
- Planning
- Reporting and Analysis
- Calculation Manager

-
Server: localhost
-
Port: 1433
-
DB Name: EPM
-
Username: epm
-
Password: ********
-
Advanced database options for selected rows - 1: No
-
Repository Directory
/home/epm/Oracle/Middleware/user_projects/epmsystem1/ReportingAnalysis/data/RM1 -
Port Range - 0: Default range (6800-6805)
-
Deploy to Application Server (WebLogic) - 1: Deploy to new domain
-
Domain Name: EPMSystem
-
Administration Server Port: 7001
-
Administrator User: epm_admin
-
Administrator Password: ********
-
Deploy the Java web applications to a single managed server - 1: No[13]
-
Deploy this Java web application - 0: Yes
- EAS
- Workspace
- Planning
- APS
- Shared Services
- RA Framework
- Financial Reporting
- CALC
-
Essbase Cluster Name: EssbaseCluster-1
-
Agent Port: 1423
- Active: Yes
-
SSL Agent Port: 6423
- Active: No
-
Start Port: 32768
-
End Port: 33768
-
Full path to application location (ARBORPATH)[14]
/home/epm/Oracle/Middleware/user_projects/epmsystem1/EssbaseServer/essbaseserver1
- Set Essbase language: 0 - English
- Binding Host Name: epm-11-1-2-4
- Configure Reporting and Analysis Framework Agent:
- Agent Port: 6860
- Agent RMI Port: 6861
- Financial Reporting - Configure RMI Ports Range - 0: Default (8205-8228)
- Setup Oracle BIEE - 1: No
- Setup Oracle BI Publisher - 1: No
- Planning - Configure RMI Server
- Port: 11333
- Web Server Type - 0: Oracle HTTP Server
- Web Server Port: 19000
- Set logical address for applications - 0: Yes
- Launch Advanced Options - 1: No
- Update the logical address for the Java web applications - 0: Set all
- Host: epm-11-1-2-4
- Port: 19000
- SSL Port: 19443
- Admin Name: admin
- Password: ********
- Verify the tasks and "Let 'er rip tater chip"

Results
Well, I would like to say it was a complete success but as with many installs, something always seems to come up. Luckily it's just OHS (Apache), but it's always something.
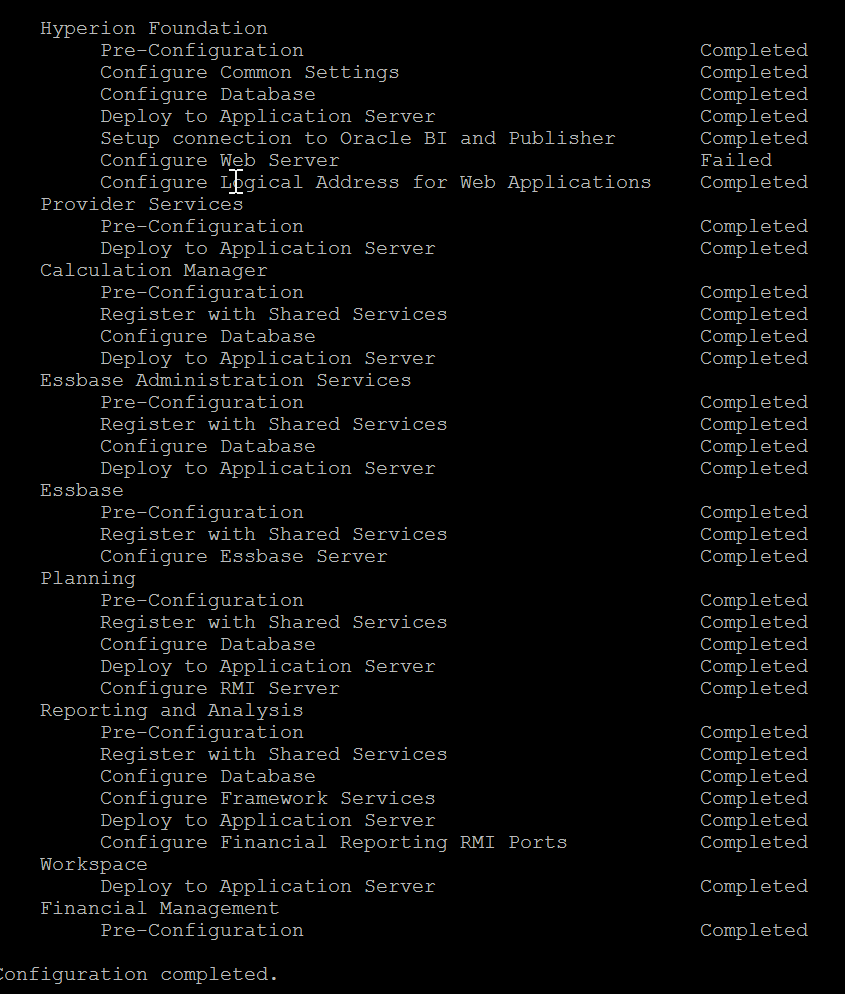
So now I got to go track down why OHS has decided to not play nice[15]. On a positive note, this was by far the fastest configure/deploy I have ever seen and this is a single virtual CPU VM on my laptop, not sure if its the GUI overhead but this was like 60 - 90 seconds for configuring and deploy.
Final Thoughts
After pouring through logs and adding libraries I eventually I gave in and installed some X11 libraries, configured Xming. Once I ran the install tool again I found that the GUI was reporting that Oracle HTTP Server had not installed correctly. I made several attempts to resolve issues but as when I eventually resolved the dependencies it started to report bizarre permissions problems. I suspect the easiest solution is to clear the install and restart since it is now complaining that it can't overwrite files created by the installer.
I plan on using SSMS but this step is optional. This is only necessary if you are running a software firewall (not enabled by default) and want to allow external connections. ↩︎
If you prefer to use the command line tools you don't need SSMS. ↩︎
Databases in SQL Server are similar to schemas in Oracle. It's uncommon to have multiple databases on the same server in Oracle, however, in SQL Server it's quite normal. ↩︎
Many of these steps require you to select a number indicating how to proceed in the installer similar to the GUI. 1: Previous, 2: Next, 3: Cancel, 4: Redisplay or 5: to Load (whatever that means). The default is generally 2. ↩︎
The installer complains that these clients are not installed and they are required but I think it should work.
5. Oracle Database Client 64-bit - 0: Next
6. Performance Management Architect - 1: Deselect[6] ↩︎- ↩︎
Default is Deselect but since I am going to be doing some tests why not have the sample apps ↩︎
- ↩︎
I have no need for HFM in this environment.
3. Financial Management Server - 1: Deselect
15. Strategic Finance - 1: Deselect
16. FDM Enterprise Edition - 0: Select[10] ↩︎No immediate plans but I might need it later so ill install and not configure it.
17. Profitability and Cost Management - 1: Deselect ↩︎These settings will depend on what values you entered in the SQL Server database configuration steps above.
5. User Name: epm
6. Password: ********
7. Launch Advanced Options - 1: No ↩︎This time it's for configuring the applications we selected to configure. I am going to keep it simple and only use a single database for the selected applications. ↩︎
Since this is a test box I probably should save on memory usage but I just haven't had much luck with this setting. ↩︎
Love the nostalgia but I would have thought by now they would have modified this to be ESSBASEPATH or something. ↩︎
Checked the configure log and found that OHS couldn't find make and quite a few other libraries related to Xorg (X11) (XWindows). I am not sure why the console bases config needs X. ↩︎